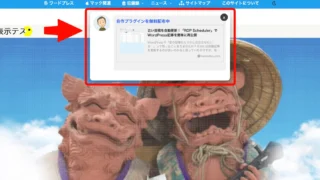
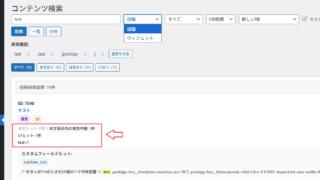


以前、『Cocoon でカスタム投稿タイプを追加してみた』で紹介した、”カスタム投稿タイプの新着記事の一覧をトップページに表示” をカスタム投稿記事別に表示期間を設定できればと思い機能の追加をすることにしました。
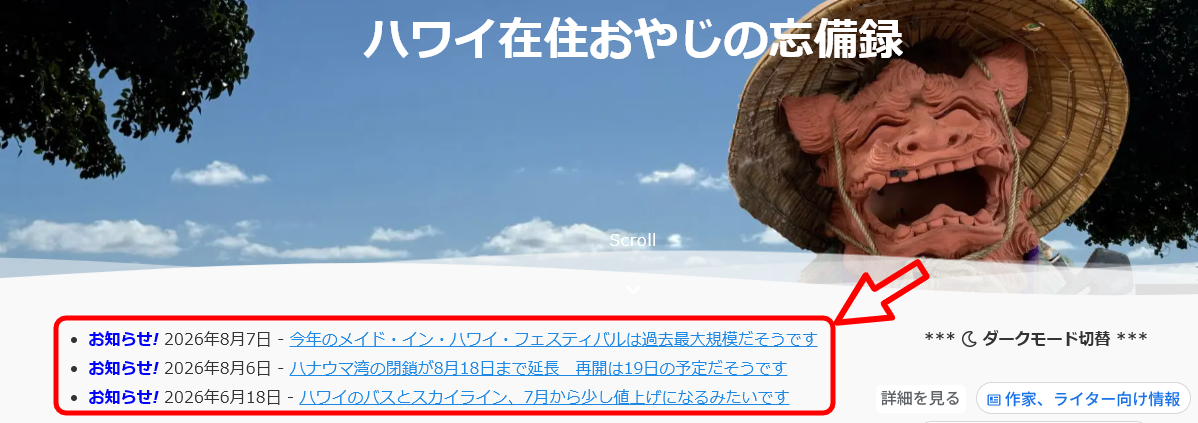
見た目は変更せずに、カスタム投稿記事を表示する対象を絞り込んで表示させるようにしたものです。
記事によっては、1つは7日間だけ、あとは14日間表示させたいといった場合に対応させるものです。
⓵ 追記するコード
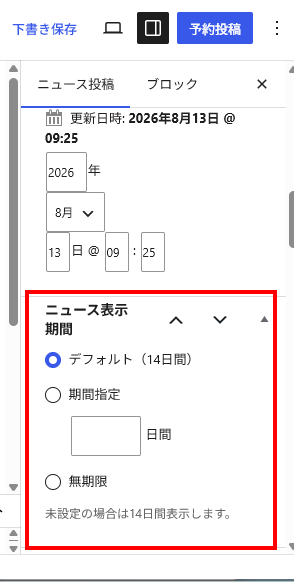
まず、カスタム投稿編集画面に「表示期間」入力欄を追加します。下記コードを function.PHPに追記します。
カスタム投稿タイプ名は”News”となていますが、黄色のハイライト部分を変更するだけで他のカスタム投稿名に対応します。表示期間のデフォルトの変更も同様です。
/**
 * 表示期間設定を使用するカスタム投稿タイプ
 *
 * 別のカスタム投稿タイプで使用する場合は
 * 'news' を変更してください。
 */
$display_period_post_type = 'news';


/**
 * デフォルトの表示期間(日)
 *
 * ここを変更することで、
 * トップページとショートコードの
 * デフォルト表示期間を一括変更できます。
 */
$default_display_days = 14;


/**
 * カスタム投稿の表示期間メタボックスを追加
 */
function custom_display_period_add_meta_box() {

	global $display_period_post_type;

	add_meta_box(
		'custom_display_period',
		'ニュース表示期間',
		'custom_display_period_meta_box_callback',
		$display_period_post_type,
		'side',
		'default'
	);
}
add_action(
	'add_meta_boxes',
	'custom_display_period_add_meta_box'
);


/**
 * 表示期間メタボックスの内容
 */
function custom_display_period_meta_box_callback( $post ) {

	global $default_display_days;

	wp_nonce_field(
		'custom_display_period_save',
		'custom_display_period_nonce'
	);

	$display_type = get_post_meta(
		$post->ID,
		'_custom_display_type',
		true
	);

	$display_days = get_post_meta(
		$post->ID,
		'_custom_display_days',
		true
	);

	/*
	 * 未設定の場合はデフォルト
	 */
	if ( $display_type === '' ) {
		$display_type = 'default';
	}
	?>

	<p>
		<label>
			<input
				type="radio"
				name="custom_display_type"
				value="default"
				<?php checked(
					$display_type,
					'default'
				); ?>
			>
			デフォルト(<?php echo esc_html( $default_display_days ); ?>日間)
		</label>
	</p>

	<p>
		<label>
			<input
				type="radio"
				name="custom_display_type"
				value="days"
				<?php checked(
					$display_type,
					'days'
				); ?>
			>
			期間指定
		</label>
	</p>

	<p style="margin-left:24px;">
		<input
			type="number"
			name="custom_display_days"
			value="<?php echo esc_attr(
				$display_days
			); ?>"
			min="1"
			step="1"
			style="width:70px;"
		>
		日間
	</p>

	<p>
		<label>
			<input
				type="radio"
				name="custom_display_type"
				value="unlimited"
				<?php checked(
					$display_type,
					'unlimited'
				); ?>
			>
			無期限
		</label>
	</p>

	<p style="font-size:12px;color:#666;">
		デフォルトの場合は、表示側で指定した
		表示期間を使用します。
	</p>

	<?php
}


/**
 * 表示期間設定を保存
 */
function custom_display_period_save( $post_id ) {

	global $display_period_post_type;

	/*
	 * nonce確認
	 */
	if (
		! isset(
			$_POST['custom_display_period_nonce']
		) ||
		! wp_verify_nonce(
			$_POST['custom_display_period_nonce'],
			'custom_display_period_save'
		)
	) {
		return;
	}

	/*
	 * 自動保存を除外
	 */
	if (
		defined( 'DOING_AUTOSAVE' ) &&
		DOING_AUTOSAVE
	) {
		return;
	}

	/*
	 * 権限確認
	 */
	if (
		! current_user_can(
			'edit_post',
			$post_id
		)
	) {
		return;
	}

	/*
	 * 対象投稿タイプ以外は除外
	 */
	if (
		get_post_type( $post_id ) !==
		$display_period_post_type
	) {
		return;
	}

	/*
	 * 表示タイプを保存
	 */
	if (
		isset(
			$_POST['custom_display_type']
		)
	) {

		$display_type = sanitize_key(
			$_POST['custom_display_type']
		);

		$allowed_types = array(
			'default',
			'days',
			'unlimited',
		);

		if (
			in_array(
				$display_type,
				$allowed_types,
				true
			)
		) {

			update_post_meta(
				$post_id,
				'_custom_display_type',
				$display_type
			);
		}
	}

	/*
	 * 表示日数を保存
	 */
	if (
		isset(
			$_POST['custom_display_days']
		)
	) {

		$display_days = absint(
			$_POST['custom_display_days']
		);

		if (
			$display_days > 0
		) {

			update_post_meta(
				$post_id,
				'_custom_display_days',
				$display_days
			);

		} else {

			delete_post_meta(
				$post_id,
				'_custom_display_days'
			);
		}
	}
}
add_action(
	'save_post',
	'custom_display_period_save'
);
コードを追記すると下記の様に表示されれば次に進みます。
② Indexページに追記
Cocoon masterフォルダーにあるindex.phpファイルをコピーし、子テーマのフォルダに複製。
複製した index.phpの<?php get_header(); ?>の下に下記を追記します。
カスタム投稿タイプ名、表示する件を変更する場合は、黄色のハイライト部分(78行目)を変更してください。
表示期間については、⓵ で設定したデフォルトの日にちが適応されます。
<?php

global $default_display_days;

$information = get_posts( array(
	'post_type'      => 'news',
	'posts_per_page' => -1,
	'post_status'    => 'publish',
	'orderby'        => 'date',
	'order'          => 'DESC',
) );

$display_information = array();

if ( $information ) {

	$now = current_time( 'timestamp' );

	foreach ( $information as $post ) {

		// 表示設定を取得
		$display_type = get_post_meta(
			$post->ID,
			'_custom_display_type',
			true
		);

		// 未設定の場合はデフォルト
		if ( $display_type === '' ) {
			$display_type = 'default';
		}

		// 無期限の場合
		if ( $display_type === 'unlimited' ) {

			$display_information[] = $post;

		} else {

			// 表示期間を取得
			$display_days = get_post_meta(
				$post->ID,
				'_custom_display_days',
				true
			);

			// 日数が未設定の場合は①のデフォルト値を使用
			if ( $display_days === '' ) {
				$display_days = $default_display_days;
			}

			$display_days = absint( $display_days );

			// 0以下の場合も①のデフォルト値を使用
			if ( $display_days <= 0 ) {
				$display_days = $default_display_days;
			}

			// 投稿日時
			$post_time = get_post_time(
				'U',
				false,
				$post
			);

			// 表示終了日時
			$expire_time = $post_time + (
				$display_days * DAY_IN_SECONDS
			);

			// 表示期間内か確認
			if ( $now <= $expire_time ) {
				$display_information[] = $post;
			}
		}

		// 最大3件
		if ( count( $display_information ) >= 3 ) {
			break;
		}
	}
}

if ( $display_information ) :
?>

<ul>

<?php
foreach ( $display_information as $post ) :
	setup_postdata( $post );
?>

<li>
	<span class="new-txt">お知らせ!</span>
	<?php the_time( 'Y年n月j日' ); ?> -
	<a href="<?php the_permalink(); ?>"><?php the_title(); ?></a>
</li>

<?php
endforeach;

wp_reset_postdata();
?>

</ul>

<?php endif; ?>
CSS等の追記については、下記記事を参考ください。
上記コードは下記記事で掲載したコードをそのまま置き変えるようにしてあるので、CSSは同じものを使用しています。
カスタム投稿タイプに対応したシンプルな新着情報一覧のショートコードのアップデート
ついでに新着情報一覧のショートコードにも対応させます。
内容については下記記事をご覧ください。
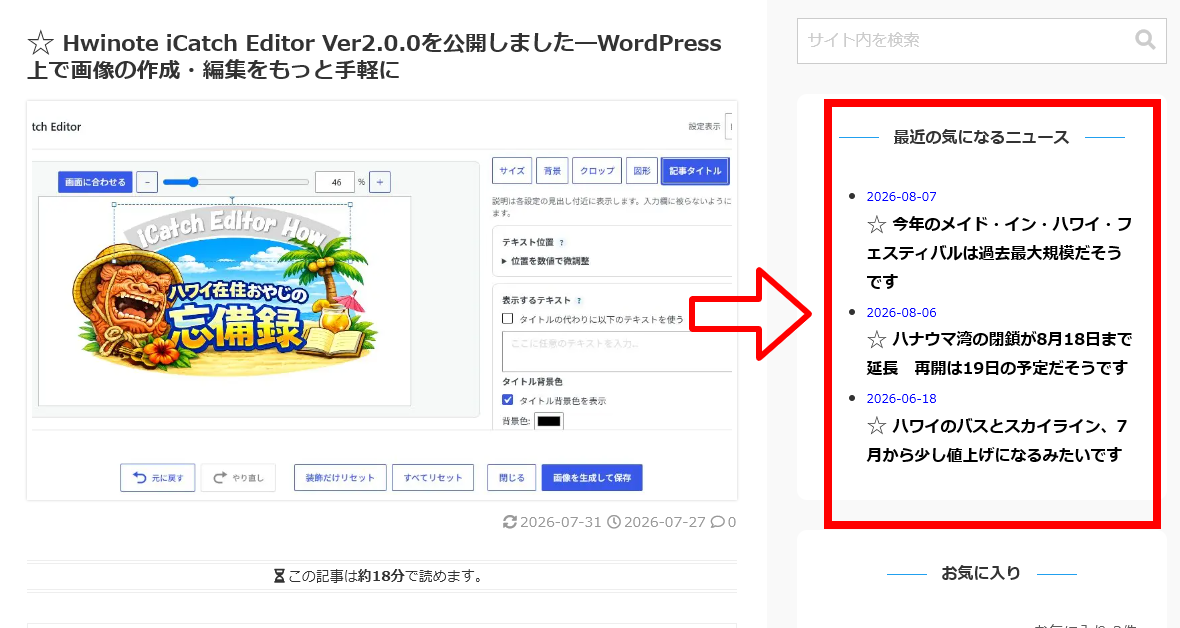
以前の記事で掲載したコードを使っている方は、丸ごと下記に置き換えてください。
これから設定する方は、function.phpに下記コードを追記してください。
カスタム投稿タイプ名、表示する件を変更する場合は、黄色のハイライト部分(11-12行目)を変更してください。
// カスタム投稿一覧ショートコード
function shortcode_custom_post_list( $atts ) {

	global $post;
	global $display_period_post_type;
	global $default_display_days;

	// ショートコードのデフォルト値
	$atts = shortcode_atts(
		array(
			'num'       => '3',
			'post_type' => 'news',
			'days'      => $default_display_days,
			'show_date' => 'no'
		),
		$atts
	);

	$num       = absint( $atts['num'] );
	$post_type = sanitize_key( $atts['post_type'] );
	$days      = absint( $atts['days'] );
	$show_date = $atts['show_date'];

	/*
	 * days が0以下の場合は
	 * ①のデフォルト値を使用
	 */
	if ( $days <= 0 ) {
		$days = $default_display_days;
	}

	// 投稿を新しい順ですべて取得
	$query_args = array(
		'posts_per_page' => -1,
		'post_type'      => $post_type,
		'post_status'    => 'publish',
		'orderby'        => 'date',
		'order'          => 'DESC',
	);

	$posts_array = get_posts( $query_args );

	$display_posts = array();

	$now = current_time( 'timestamp' );

	foreach ( $posts_array as $post_item ) {

		/*
		 * 表示期間設定の対象投稿タイプの場合
		 * 投稿ごとの表示期間設定を使用
		 */
		if (
			$post_type ===
			$display_period_post_type
		) {

			$display_type = get_post_meta(
				$post_item->ID,
				'_custom_display_type',
				true
			);

			/*
			 * 無期限
			 */
			if (
				$display_type === 'unlimited'
			) {

				$display_posts[] = $post_item;

			} else {

				/*
				 * 期間指定の場合
				 */
				if (
					$display_type === 'days'
				) {

					$display_days = get_post_meta(
						$post_item->ID,
						'_custom_display_days',
						true
					);

					/*
					 * 日数が未入力の場合は
					 * ショートコードの days を使用
					 */
					if (
						$display_days === ''
					) {
						$display_days = $days;
					}

				} else {

					/*
					 * デフォルトの場合は
					 * ショートコードの days を使用
					 */
					$display_days = $days;
				}

				$display_days = absint(
					$display_days
				);

				/*
				 * days が0以下の場合は
				 * ①のデフォルト値を使用
				 */
				if (
					$display_days <= 0
				) {
					$display_days =
						$default_display_days;
				}

				/*
				 * 投稿日時
				 */
				$post_time = get_post_time(
					'U',
					false,
					$post_item
				);

				/*
				 * 表示終了日時
				 */
				$expire_time = $post_time + (
					$display_days *
					DAY_IN_SECONDS
				);

				/*
				 * 表示期間内なら追加
				 */
				if (
					$now <= $expire_time
				) {
					$display_posts[] =
						$post_item;
				}
			}

		} else {

			/*
			 * 表示期間設定の対象外の投稿タイプは
			 * ショートコードの days を使用
			 */
			$display_days = $days;

			$post_time = get_post_time(
				'U',
				false,
				$post_item
			);

			$expire_time = $post_time + (
				$display_days *
				DAY_IN_SECONDS
			);

			if (
				$now <= $expire_time
			) {
				$display_posts[] =
					$post_item;
			}
		}

		/*
		 * 指定件数に達したら終了
		 */
		if (
			$num > 0 &&
			count( $display_posts ) >= $num
		) {
			break;
		}
	}

	/*
	 * 投稿がない場合
	 */
	if ( empty( $display_posts ) ) {

		return '<p style="text-align: center; color: gray;">'
			. '特にありませんでした。'
			. '</p>';
	}

	$html = '<ul>';

	foreach ( $display_posts as $post_item ) {

		$post = $post_item;

		setup_postdata( $post );

		$html .= '<li>';

		/*
		 * 投稿日を表示
		 */
		if ( $show_date === 'yes' ) {

			$html .=
				'<span style="color: blue; font-size: 12px;">'
				. esc_html( get_the_date() )
				. '</span><br>';
		}

		/*
		 * タイトル
		 */
		$html .=
			'<a href="'
			. esc_url( get_permalink() )
			. '" style="font-weight: bold; color: black; text-decoration: none;">'
			. esc_html( get_the_title() )
			. '</a>';

		$html .= '</li>';
	}

	$html .= '</ul>';

	wp_reset_postdata();

	return $html;
}

add_shortcode(
	'custom_post_list',
	'shortcode_custom_post_list'
);
下記が使用するショートコードで、オプションをすべて含めたものとなります。
他の青色ハイライトの部分は省略しても問題ないです。
[custom_post_list num="5" days="15" show_date="yes" post_type="news"]| オプション | 用途 | ディフォルト |
|---|---|---|
| num | 表示させる記事数 | 3記事 |
| days | 投函日からの表示期間 | ⓵で設定した期間 |
| show_date | 投函日の表示あり、なし | NO”のなし |
| post_type | カスタム投稿タイプ名 | news(設定したカスタム投稿名) |
上記、オプションを記載しない場合には、ディフォルトが適応されます。
お知らせの表示期間の設定について
投稿ごとに、投稿編集画面の「表示期間」から、次の3つを選択できます。
- デフォルト(14日間) 投稿部から14日間表示されます
- 期間指定 投稿日から指定した日数表示されます
- 無期限 表示され続けます
デフォルトの表示期間は、①の設定コードで変更できます。
ショートコードで表示期間を指定する場合
custom_post_list ショートコードでは、days を指定することができます。
例えば、
[custom_post_list days="10"]とすると、ショートコード側では10日間を指定できます。
また、
[custom_post_list]この場合は、設定したデフォルトの表示期間が使用されます。
投稿側で期間を指定した場合
ショートコードで表示期間を指定していても、投稿編集画面で「期間指定」を設定した投稿は、投稿側の設定が優先されます。
例えば、
[custom_post_list post_type="news" days="10"]としていても、投稿側で期間指定 → 30日間と設定した場合は、30日間表示されます。
設定例
| 投稿の設定 | ショートコード | 実際の表示期間 |
|---|---|---|
| デフォルト(14日間) | days="10" | 10日間 |
| 期間指定 5日間 | days="10" | 5日間 |
| 期間指定 30日間 | days="10" | 30日間 |
| 無期限 | days="10" | 無期限 |
つまり、投稿側で個別の期間を設定した場合は、その設定が優先されます。
投稿側が「デフォルト」の場合は、ショートコードで指定した表示期間が使用されます。
さいごに
投稿別に表示するものを指定できるようにしたものです。
内容によっては3日間だけ表示させたいけれど、他は14日間表示のままにしたい場合に対応させたものです。
興味のある方はお試しください。
コメント